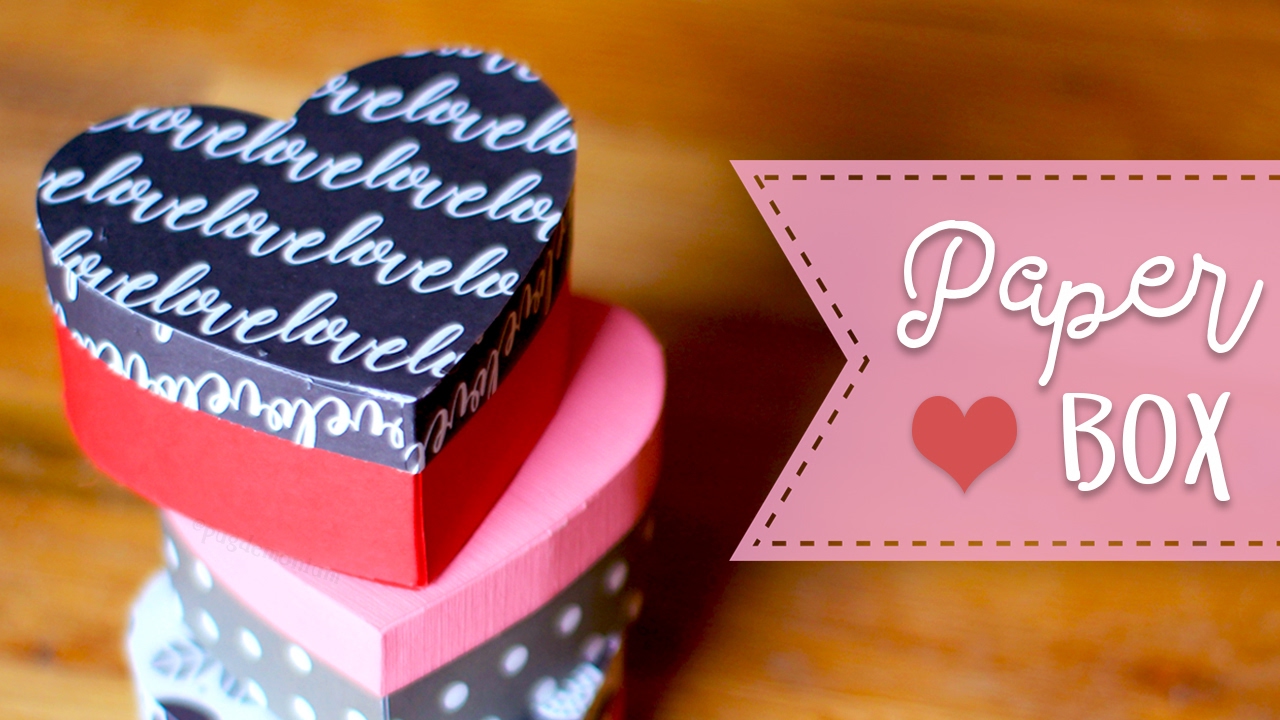

Create a novelty box in the shape of a heart to give to your Valentine on Valentine's Day. Choose from several different printable patterns to create three different sizes of heart boxes that may either stack or nest with one another. This adorable gift box is perfect for holding smaller presents and will elicit grins and good feelings wherever it is displayed. Before getting started, make sure you read through all of the stages.
Step 1: Select a Design and Get It Printed Off
Pick a box that you want to construct. The pattern is available for download and printing. Both the smaller box design (234" by 314" by 112") and the little box pattern (212" by 234" by 1") include both the box bottom and the box top in their instructions. The large box (314" by 4" by 112") requires distinct patterns for the box's bottom and shelter to be appropriately constructed. The Heart Cutouts template provides you with more box tops and bottoms options, or you can use them as box liners instead.
Step 2:Make your cuts
Make cuts along the solid black lines surrounding the heart shaped gift box components. Make an effort to cut precisely. If the reductions carefully adhere to the outlines of the template, the box will be a more durable and better fit when assembled. It will be easier to cut some of the materials if you have a straight edge and a craft knife, but you should still take precautions to protect the table by placing a cutting mat or a thick piece of cardboard below it.
Step 3:Keeping a Score
Make a score line on the bottom of the tabs on the side strip and on the line where the glue tabs are by using a ruler or another straight edge. Cut the side strip between the 9th and 10th notches to provide the score for the smaller box.
Step 4:Fold
After folding the tabs, unfurl them to form an angle of roughly 90 degrees. Fold along the other lines that have been scored. The point of the heart serves as the location of the center scoreline. Checking the size by bending the side strip around the heart shape. As a step toward getting ready to apply glue, turn the side strip to surround the heart-shaped cutout.
Step 5:Glue
Apply a microscopic layer of white glue on the interior surfaces of the adhesive tabs. Spread a thin layer of glue around the edge of one of the heart-shaped cutouts. Check that the width of the glue band matches the depth of the tabs you are using.
Step 6:Make Box Top
For the lid of the box, repeat steps 1 through 5. You can choose to glue the insets onto the second heart-shaped cutout if you want to. Cut a piece of paper into a strip that is the same length as the side strip.
Step 7:Decorate the box top
You can embellish the top of the box however you wish! Around each top's side, wrap a strip of paper in a color that coordinates with the rest of the piece. Make smaller heart shapes out of beautiful paper by cutting them with inset designs.